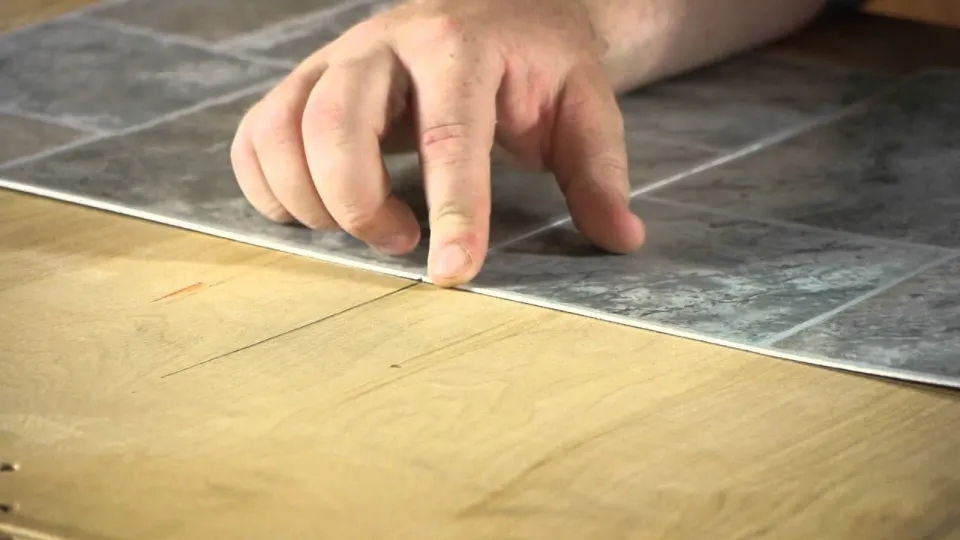
One of the most affordable flooring options available, vinyl is durable and water-resistant. “How to install sheet vinyl flooring” is a do-it-yourself project that is doable. The secret to success is planning.
How to install vinyl sheet flooring is explained here.
- Allow for Easy Unrolling of Vinyl Sheet Flooring
- Make Sure to Have Necessary Equipment for Installation
- Prepare the Area to Lay Sheet Vinyl Flooring
- Ensure That the Subfloor is Level and Smooth
- Before Installing the Vinyl Sheet Flooring, Cut It Down to Size
- Make Sure to Secure the Vinyl Sheet With Adhesive Tape
- Put Up the Baseboards and Make the Room Look Cute
Please read on for more detailed information.
How to Install Sheet Vinyl Flooring?
Below are specific steps on how to install sheet vinyl flooring:
Allow for Easy Unrolling of Vinyl Sheet Flooring

Place this exquisitely crafted flooring close to the job site for about 24 hours before starting the installation process.
Set the thermostat to 85 or 65 degrees Fahrenheit as well. During installation, the sheet will roll up more easily at this temperature. Now we move to the second step;
Make Sure to Have Necessary Equipment for Installation
You will need a knife, oscillating multi-tool, utility knife, tape measure, double-sided flooring tape, and level compound to lay the sheet vinyl flooring.
You can start installing vinyl sheet flooring as soon as you have all the required tools. The third step is;
Prepare the Area to Lay Sheet Vinyl Flooring

Regardless of the type of flooring you are installing, i.e. vinyl laminate or wooden flooring. This professionally made flooring must be installed in a location that has been properly prepared.
Before beginning, remove all baseboards, shoe molding, and trim from the area. Considering that each of these things could cause a problem when installing them.
Ensure That the Subfloor is Level and Smooth
Prior to beginning the installation of the vinyl sheet flooring, make sure the subfloor is even and smooth.
It is important to treat any gaps, gouges, and seams. You could fill in the cracks and seams with the level compound.
Before Installing the Vinyl Sheet Flooring, Cut It Down to Size
Make sure to cut the flooring first from the corners, leaving 4 inches on all sides up to the walls.
Allow the flooring to acclimate to the space for about two hours so that it can fit the size of the area.
Make Sure to Secure the Vinyl Sheet With Adhesive Tape

after spending two hours there. Remove it right away, then use double-sided adhesive tape to attach the vinyl sheet flooring to the floor.
Don’t attempt to tape off the entire floor. Only place it in busy areas, and make sure it rests flat. Roll the flooring back into place and firmly press it against the tape to reinstall it.
Put Up the Baseboards and Make the Room Look Cute
All of the shoe molding or baseboards that were taken out during installation should be replaced.
This will give the entire project a polished appearance. Clean up every mess by vacuuming. The installation process is now complete, and your lovely new floor covering is ready for you to enjoy.
Crucial Gluing Tips
- Follow the instructions for “open time” on the adhesive container. Between spreading the glue and placing the vinyl, that is the amount of time. Bubbles will form as the extra solvent tries to escape if the vinyl is laid down too soon.
- When spreading the adhesive, use the precise-sized notched trowel that is recommended and hold it at a 60-degree angle to the ground.
- Be careful to evenly distribute the adhesive in all of the crevices and corners.
- Apply adhesive with a trowel around the edges before applying an even coat in the center. Leave no extra glue globs on the surface. In the finished floor, these will result in bumps.
- To prevent double-coating, trowel the second half of the glue in a straight line next to the vinyl that has been rolled back. The middle of the finished floor will have a line if there was an adhesive buildup here.
- Keep a warm water bucket nearby, along with a sponge or rag, and clean up any leftover adhesive right away. Without a specialized solvent, it becomes very challenging to remove the adhesive once it begins to dry.
- As soon as the vinyl has been adhered, roll it. On small floors, use a rolling pin; for large areas, rent a floor roller. Work outward from the center.
- Be patient if bubbles persist after you’ve finished rolling; they’ll likely vanish over night. If they don’t, cut the bubbles with a utility knife, flatten them out, and then seal the cuts with specialized seam sealer.

How to Fit Difficult Areas When Laying Sheet Vinyl Flooring?
Installing sheet vinyl flooring in a bathroom can occasionally be difficult. As a result, many of them have radiator pipes and architraves, in addition to having to deal with toilet and sink pedestals. In order to create a waterproof barrier, it is always a good idea to apply silicone sealant to the bathroom floor’s edges.
Top Tip – Gluing Vinyl
Vinyl flooring doesn’t always need to be glued down. Heavy duty “stay flat” vinyl can be laid without adhesive because it doesn’t shrink or lift. Glue should be used at joins and around the edges of cushioned vinyl when it is being laid. It is necessary to firmly secure thinner, uncushioned types everywhere. After installing your vinyl, roll back half of it and spread adhesive (using the kind supplied by or advised by the manufacturer) on the floor. Repeat the process for the other half of your room, moving the vinyl as necessary. After everything has been put back in place, use a soft broom to press the vinyl flat.
- You must lay vinyl up to the front of the pedestal and then fold it back on itself to fit it around your toilet or wash basin pedestal. Cut straight in with scissors from the pedestal’s edge to its center.
- Make several cuts in the vinyl around the pedestal’s base until the sheet is flat. Avoid cutting too deeply or tearing the vinyl.
- All the way around the pedestal base, score a sharp crease in the vinyl using a bolster chisel.
- As you carefully trim each vinyl flap until it fits, carefully cut around the crease you just made. Put adhesive on the floor surrounding the pedestal, then peel back the vinyl and press it back into place. If you want, you can use silicone sealant to seal the edges.
- Make a series of vertical cuts all the way up to the vinyl’s floor contact point to fit the vinyl around a door frame. Trim the excess, but leave 50mm to 100mm turned up at floor level to allow for more precise trimming.
- Cut along the crease after pressing the vinyl into the incline between the door frame and the floor. The vinyl should then be cut so that it ends halfway under the door, straight across the door’s line. To hold the vinyl edge down and safeguard it, install a threshold bar.
- Make a straight cut from the edge of the vinyl to the pipe in order to fit it around the pipe. In order to get the vinyl to lie flat around the pipe, make a series of tiny cuts at the slit’s pipe end. Get a neat finish by trimming the slit pieces.
Read about Is Vinyl Flooring Waterproof?

How to Join Vinyl Sheets?
To cover the entire floor in a large room, you might need to join two or more sheets. Use sheets from the same roll whenever possible because they tend to be more uniform in color. Also, avoid joining the sheets at the doorway because it is the area that sustains the most wear.
- It is necessary to move the second sheet along until the pattern matches the first sheet when joining patterned sheets. If you’re having trouble, try overlapping the sheets until the patterns match, then using a straightedge and knife, cut through both sheets.
- Fold back the edges of the sheets without moving them, and then stick them to the floor with adhesive or double-sided tape. To glue the joint, apply strong pressure with both hands.
How to Buy Vinyl Flooring?
There are two types of vinyl flooring: inlay and rotovinyl. A pattern of vinyl chips is dispersed on a backing and melted together to create inlay vinyl. DIYers are not advised to use it because it can be somewhat brittle and difficult to cut and seam.
Rotovinyl, the alternative material, is much simpler to install and is made by laminating a vinyl pattern between a backing sheet and a clear wear layer. Both a felt and a vinyl backing are offered for rotovinyl. In contrast to vinyl-backed flooring, which only needs a thin band of adhesive around the edges and along the seams, the felt-backed version we’re using requires you to spread glue over the entire floor. In order to demonstrate how to install felt-backed rotovinyl over a fresh layer of unique 1/4-in. underlayment plywood. Get instructions for the specific type of flooring you choose as installation techniques and adhesives differ for each type of vinyl flooring and between manufacturers.
6- and 12-foot lengths of vinyl flooring are offered. widths. Self-installing the vinyl will cut the cost in half or more. Even less expensive flooring will last a decade, but more expensive flooring has a thicker wear layer and may have richer patterns. By bending a sample corner, you can compare how flexible various floors are. Installing the flooring without tearing it will be difficult if the backing is fragile or the vinyl seems stiff.
Sheet vinyl flooring is kept in stock at home centers and flooring merchants. Additionally, there are flooring sample orders available. Bring a sketch of your room that has been dimensioned, and ask the salesperson for assistance calculating the quantity. Check the installation specifications before buying the appropriate adhesive, caulk, trowel, floor filler, and seam sealer (if your installation requires a seam).
Read about How Much Does It Cost to Install Vinyl Plank Flooring?
Final Words!
I hope you learned something from this article and are now familiar with the straightforward procedures for installing sheet vinyl flooring.
To install vinyl sheet flooring with flaws in your home, I strongly advise you to use these tiles. These recommendations are much more straightforward and efficient.
Quick look at install sheet vinyl flooring:
- Allow for Easy Unrolling of Vinyl Sheet Flooring
- Make Sure to Have Necessary Equipment for Installation
- Prepare the Area to Lay Sheet Vinyl Flooring
- Ensure That the Subfloor is Level and Smooth
- Before Installing the Vinyl Sheet Flooring, Cut It Down to Size
- Make Sure to Secure the Vinyl Sheet With Adhesive Tape
- Put Up the Baseboards and Make the Room Look Cute


